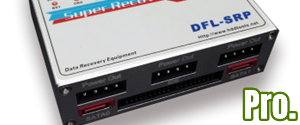
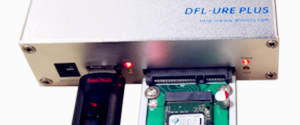
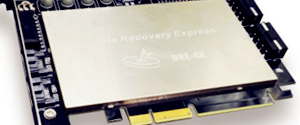
What data recovery tools to buy if you want to start a data recovery business?
Free video data recovery training on how to recover lost data from different hard drives?
Where to buy head and platter replacement tools at good prices?
Data recover case studies step by step guide
I want to attend professional data recovery training courses
Hitachi hard drive is one of the main hard drive brands nowadays, IBM(later Hitachi) is widely known in data recovery business for their line of DeskStar HDDs also known as DeathStars. These hard drives, mostly DTLA and AVER families, became infamous for their reportedly high failure rates. It is believed their problems were mainly connected with glass platters – new technology introduced by Hitachi in these hard drives. After some time magnetic layer started to fall off the platters creating dust inside the HDA(Head Disk Assembly). This led to a massive number of bad sectors, eventually killing the heads making all data inaccessible.
Hitachi Travelstar laptop hard drive: 5400rpm motor, ATA interface and 40GB of data storage.

>Several Philips screws (one of which is shown here at the top left corner) must be removed to free the Hitachi hard disk from the silver hard disk assembly used to hold the hard drive securely within the Dell Inspiron’s hard disk bay.

>This silver cage, perforated to encourage cooling airflow, holds the hard disk securely within the Dell’s hard disk bay.

>Once the hard disk cage’s screws are removed, the assembly falls free from the Hitachi hard drive. The Hitachi’s circuit board, shown here on the right, is then revealed.

>To continue disassembling the Hitachi Travelstar, next several small Torx screws must be removed. So, too, must the drive’s label.

>The hard disk’s label must be removed to reveal a seventh hidden Torx screw. Once this last Torx screw is eliminated, the cover freely opens. It should be noted, of course, that removing the label (even if the screw behind the label remains) voids the manufacturer’s warranty.

>Once the seven Torx screws are removed, the drive’s front cover (now shown on the left) easily slips away.

>Removing the cover reveals the actual Hitachi hard disk platter (the large silver mirror-like disk), actuator arm (whose arm begins at approximately the 7 o’clock position in this image) and spindle motor (the silver circle in the center). Meanwhile, the actuator arm mechanism, which is responsible for controlling and moving the actuator arm, is the silver metallic assembly in the bottom left corner.

>Here’s a close up of the underside of the Hitachi hard drive’s front cover.

>Here you can see the Hitachi Travelstar actuator arm, controller assembly and circuit board. The actual hard disk head, which is responsible for reading and writing data, sits at the very tip of the actuator arm.

>In this closeup of the Travelstar’s actuator arm, you can see the read/write head that sits at the arm’s tip. The head, of course, is responsible for reading and writing data to the Travelstar’s hard disk platter.

>Here’s the Hitachi Travelstar hard disk with the actuator arm, assembly and circuit board removed. All that remains, essentially, is the Travelstar hard disk platter and the spindle motor hub.

>The actual Hitachi Travelstar hard disk is smaller than a mini CD. Here you can see it pictured next to a small screwdriver.

>Once the actuator assembly, arm and circuit board, hard disk platter and spindle motor cap are removed, there’s little left behind in the Travelstar.

>The Travelstar’s spindle (and spacer) are tiny. Engineered to perform at precise tolerances, the actual spindle cover and spacer are quite small; they must be to accommodate the smaller mobile two-and-a-half inch hard disks.

>Removing several additional Torx screws from the drive’s bottom enables slipping the Travelstar’s circuit board away from the hard disk cover.
This specific board features Samsung-manufactured circuits. The board also contains the pin assembly (positioned here on the board’s left edge) used to connect the drive to a PC or IDE cable.

>The backside of the Hitachi Travelstar Circuit Board reveals the component was manufactured in Malaysia.
Here you can also see another view of the same pin assembly shown in the last image (positioned here along the board’s right edge).

>Here are all the components that powered this Hitachi Travelstar mobile drive through its three-year lifecycle.

Data recovery Salon welcomes your comments and share with us your ideas, suggestions and experience. Data recovery salon is dedicated in sharing the most useful data recovery information with our users and only if you are good at data recovery or related knowledge, please kindly drop us an email and we will publish your article here. We need to make data recovery Salon to be the most professional and free data recovery E-book online.

4 Comments
I have to take apart an Hitachi Travelstar to recover some data and I need to know wich sizes of torx screwdriver you used. That info is very important, please reply asap.
Thanks!
Best Regards.
Super post, tienen que marcarlo en Digg
Miato
i have taken apart a non-working 40GB hitachi travelstar in an attempt to switch platters with a working drive to recover the data. when i got the the part where i unscrew the platter from the spindle motor, i can’t loosen the torx screw because i can’t hold the platter from rotating. i could put my fingers on the platter but that would defeat my purpose. i need a spanner to put into the 4 holes of the spindle. i’ve seen a short video online which shows a clear plastic disk with four pins in the center that is placed over the platter and still allows the torx driver to go through the center to unscrew the screw.
is there some place to get these spanners?
is there come other way to keep these from turning?
thanks!
j
My HITACHI 5K320-160 Model HTS543216L9SA00 is not running at all, so I tried to open it. The tutorial was really usefull so I easily could to open metal cover (even Torx central screw needs a smaller screwdriver (grrrr …)
Unfortunately I didn’t find any macroscopic due to malfunction so I couldn’t to understand why the hard drive is not running. Can you suggest some help?
Thanks for attention
Maurizio from Italy