What data recovery tools to buy if you want to start a data recovery business?
Free video data recovery training on how to recover lost data from different hard drives?
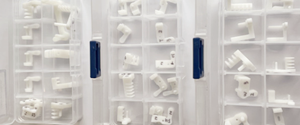
Where to buy head and platter replacement tools at good prices?
Data recover case studies step by step guide
I want to attend professional data recovery training courses
Usually to recover data from dead hard drives is not a easy thing and it requires some professional data recovery work and usually cost a lot like over USD1000.
When we talk about dead hard drive, we usually connect this case to clean room data recovery opening hard drives and swapping heads or platters. But the following data recovery cases, you don’t need to have clean room or open the hard drives, you just need to follow some simple steps to get the drive restored.
Example drive used: Maxtor drive, 0 rpm, not detected in the bios.
step 1 Get a donor hard drive of the same make as the failed drive
I determined that the harddrive problem was not a crash because, it wasn’t making any weird noises (or any noises at all). When I plugged the harddrive in, I started feeling the components on the controller board, some of which were burning hot. (another indicator that the controller board was burnt out).
I was lucky enough to have another Maxtor of the same make, even though it was of different size, the ICs and components had the same value on the circuit board. So I thought, it couldnt hurt to try and swap the boards.
step 2 Remove the controller board

Now locate the torx/security screws on each hardrive. On the Maxtor they were relatively easy to locate (the red circles in the first picture). And use the appropriate sized bit for your drive screws (T8 for the Maxtor).
Remove the defective hard drive board and place it in your junk box. The board should lift up, with some pretty fragile foam cushioning it underneath, try to salvage a full piece from either hard drive to use on your repaired drive with the data. Take the functional board and place it carefully where the last board was so that the connections (in red circles on the second picture) line up with the solder pads under the board so it is interfaced with the hard drive head and platter.
step 3 Plug and Pray

Plug the ATA and power into your hopefully functional frankenstein drive, make sure the jumper is set correctly on the new board and hope that it works!
Reference: instructables.com
Data recovery tools used to repair and recover dead hard drives
Data recovery Salon welcomes your comments and share with us your ideas, suggestions and experience. Data recovery salon is dedicated in sharing the most useful data recovery information with our users and only if you are good at data recovery or related knowledge, please kindly drop us an email and we will publish your article here. We need to make data recovery Salon to be the most professional and free data recovery E-book online.

Comments are closed
Sorry, but you cannot leave a comment for this post.