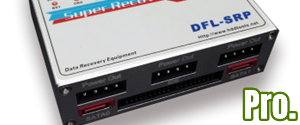
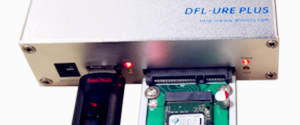
What data recovery tools to buy if you want to start a data recovery business?
Free video data recovery training on how to recover lost data from different hard drives?
Where to buy head and platter replacement tools at good prices?
Data recover case studies step by step guide
I want to attend professional data recovery training courses
Western Digital drive is not recognized in Windows or Mac, is it dead?
If you meet familiar cases with your western digital drives, you need to firstly figure out if you have important data on your drive. If you want to take the data back, you should not put your hard disk into danger by some further operations on the disks, because you may destroy the data and make the data unrecoveryable. If you don’t have the backup of your important data, you may deliver your drive to a professional data recovery lab which provides western digital data recovery services and recover your data successfully.
If you have already the backup of the data, you can follow the following steps to check if your drive is still alive.
The following information can be for your reference:
>>* Check the jumper settings (if it’s an EIDE drive)
The wrong jumper setting would make your computer not recognized the hard drive. Western Digital jumper settings for a single drive is slightly different from other manufacturers.
>>* Try a different EIDE or SATA cable
If a bad data cable is installed, the symptoms could be ranging from corrupt data, wrong info in BIOS, to not recognizing the drive.
>>* Check the BIOS (for Mac it’s the BootROM)
If you have an older computer that cannot recognized your new drive, You may need to use the Alternate Jumper Settings.
How to configure a WD EIDE drive using the Alternate Jumper Settings
When NOT to use Alternate Jumper Settings:
* If you are running Windows 2000/XP/Vista.
* If the system can boot with just one jumper on the drive without locking up.
* If the drive is installed on an IDE controller card that is providing support to access the full drive capacity.
When to use Alternate Jumper Settings
The most common scenario when a drive should be configured with the Alternate Jumper Settings is when the system hangs up or freezes upon boot up after auto-detecting all IDE devices. The reason for this error is because the drive capacity is larger than what the system can support.
What happens after the drive is configured with the Alternate Jumper Settings
The full capacity of the drive is not recognized. In order for the system to boot properly, the BIOS will recognize smaller drive capacity. Depending on your BIOS, your drive will recognize one of the following sizes: 2.1GB, 8.4GB, 32GB.
Configuring a single (alone on the IDE cable) drive with the Alternate Jumper Settings
If you are connecting your drive as the only IDE device on the cable, place the jumper shunts on pins 3 & 4 and 5 & 6. Connect the drive to the black connector at the end of the cable.
Configuring a primary or dual Master drive with the Alternate Jumper Settings
If you are connecting your drive as the Master drive on the cable with another IDE device, place the jumper shunts on pins 1 & 2 and 5 & 6. Then configure the jumper on the other IDE device as Slave. Connect the Master drive to the black connector at the end of the cable and the Slave device to the gray connector located at the middle of the cable.
Configuring a secondary or dual Slave drive with the Alternate Jumper Settings
If you are connecting your drive as the Slave drive on the cable with another IDE device, place the jumper shunts on pins 1 & 2 and 3 & 4. Then configure the jumper on the other IDE device as Master. Connect the drive to the gray connector at the middle of the cable and the other IDE device to the black connector located at the end of the cable.
>>*Run Data Lifeguard Diagnostics(Data Lifeguard Diagnostics only works on Windows PC’s.)
Data Lifeguard Diagnostics can help you diagnose and solve most common problems.
1. Boot your computer and set your system BIOS to boot to a CD or Floppy disk first. If you do not know how to enter or adjust your system BIOS please refer to your computer/motherboard user manual or contact the manufacturer.
2. Save the new BIOS setting and insert the Data Life Guard diagnostic disk into your disk drive.
3. You will be brought to the License Agreement screen, read the agreement and hit the Esc button.
4. Press the Y key to accept the license agreement.
5. You will be at the main menu for the Diagnostic Utility. Use the down arrow button to highlight Extended Test and press the Enter key.
6. The software will tell you that a Quick Test will be run first. Press R to continue.
7. After the Quick Test is run you should receive a four-digit error code that will indicate the status of your drive.
8. If you receive an error code of 0000, this indicates that the hard drive does not contain any defects or errors and is working properly.
After being tested and you will get Data Lifeguard Diagnostics error codes and from these codes, you are able to understand if your drive is dead.
Data recovery Salon welcomes your comments and share with us your ideas, suggestions and experience. Data recovery salon is dedicated in sharing the most useful data recovery information with our users and only if you are good at data recovery or related knowledge, please kindly drop us an email and we will publish your article here. We need to make data recovery Salon to be the most professional and free data recovery E-book online.

Comments are closed
Sorry, but you cannot leave a comment for this post.